Visual studio code
Lab exercises are designed to help you gain practical experience with web technologies. You should elaborate on these exercises to confirm you understand and deploy the learning you find here in your own code.
In this module we will be using the VSCode text editor to create and edit code files.
VSCode will help us to write in HTML, CSS, JavaScript and PHP and will also act as a server that can communicate with the web browser over HTTP to create a complete development environment for the web.
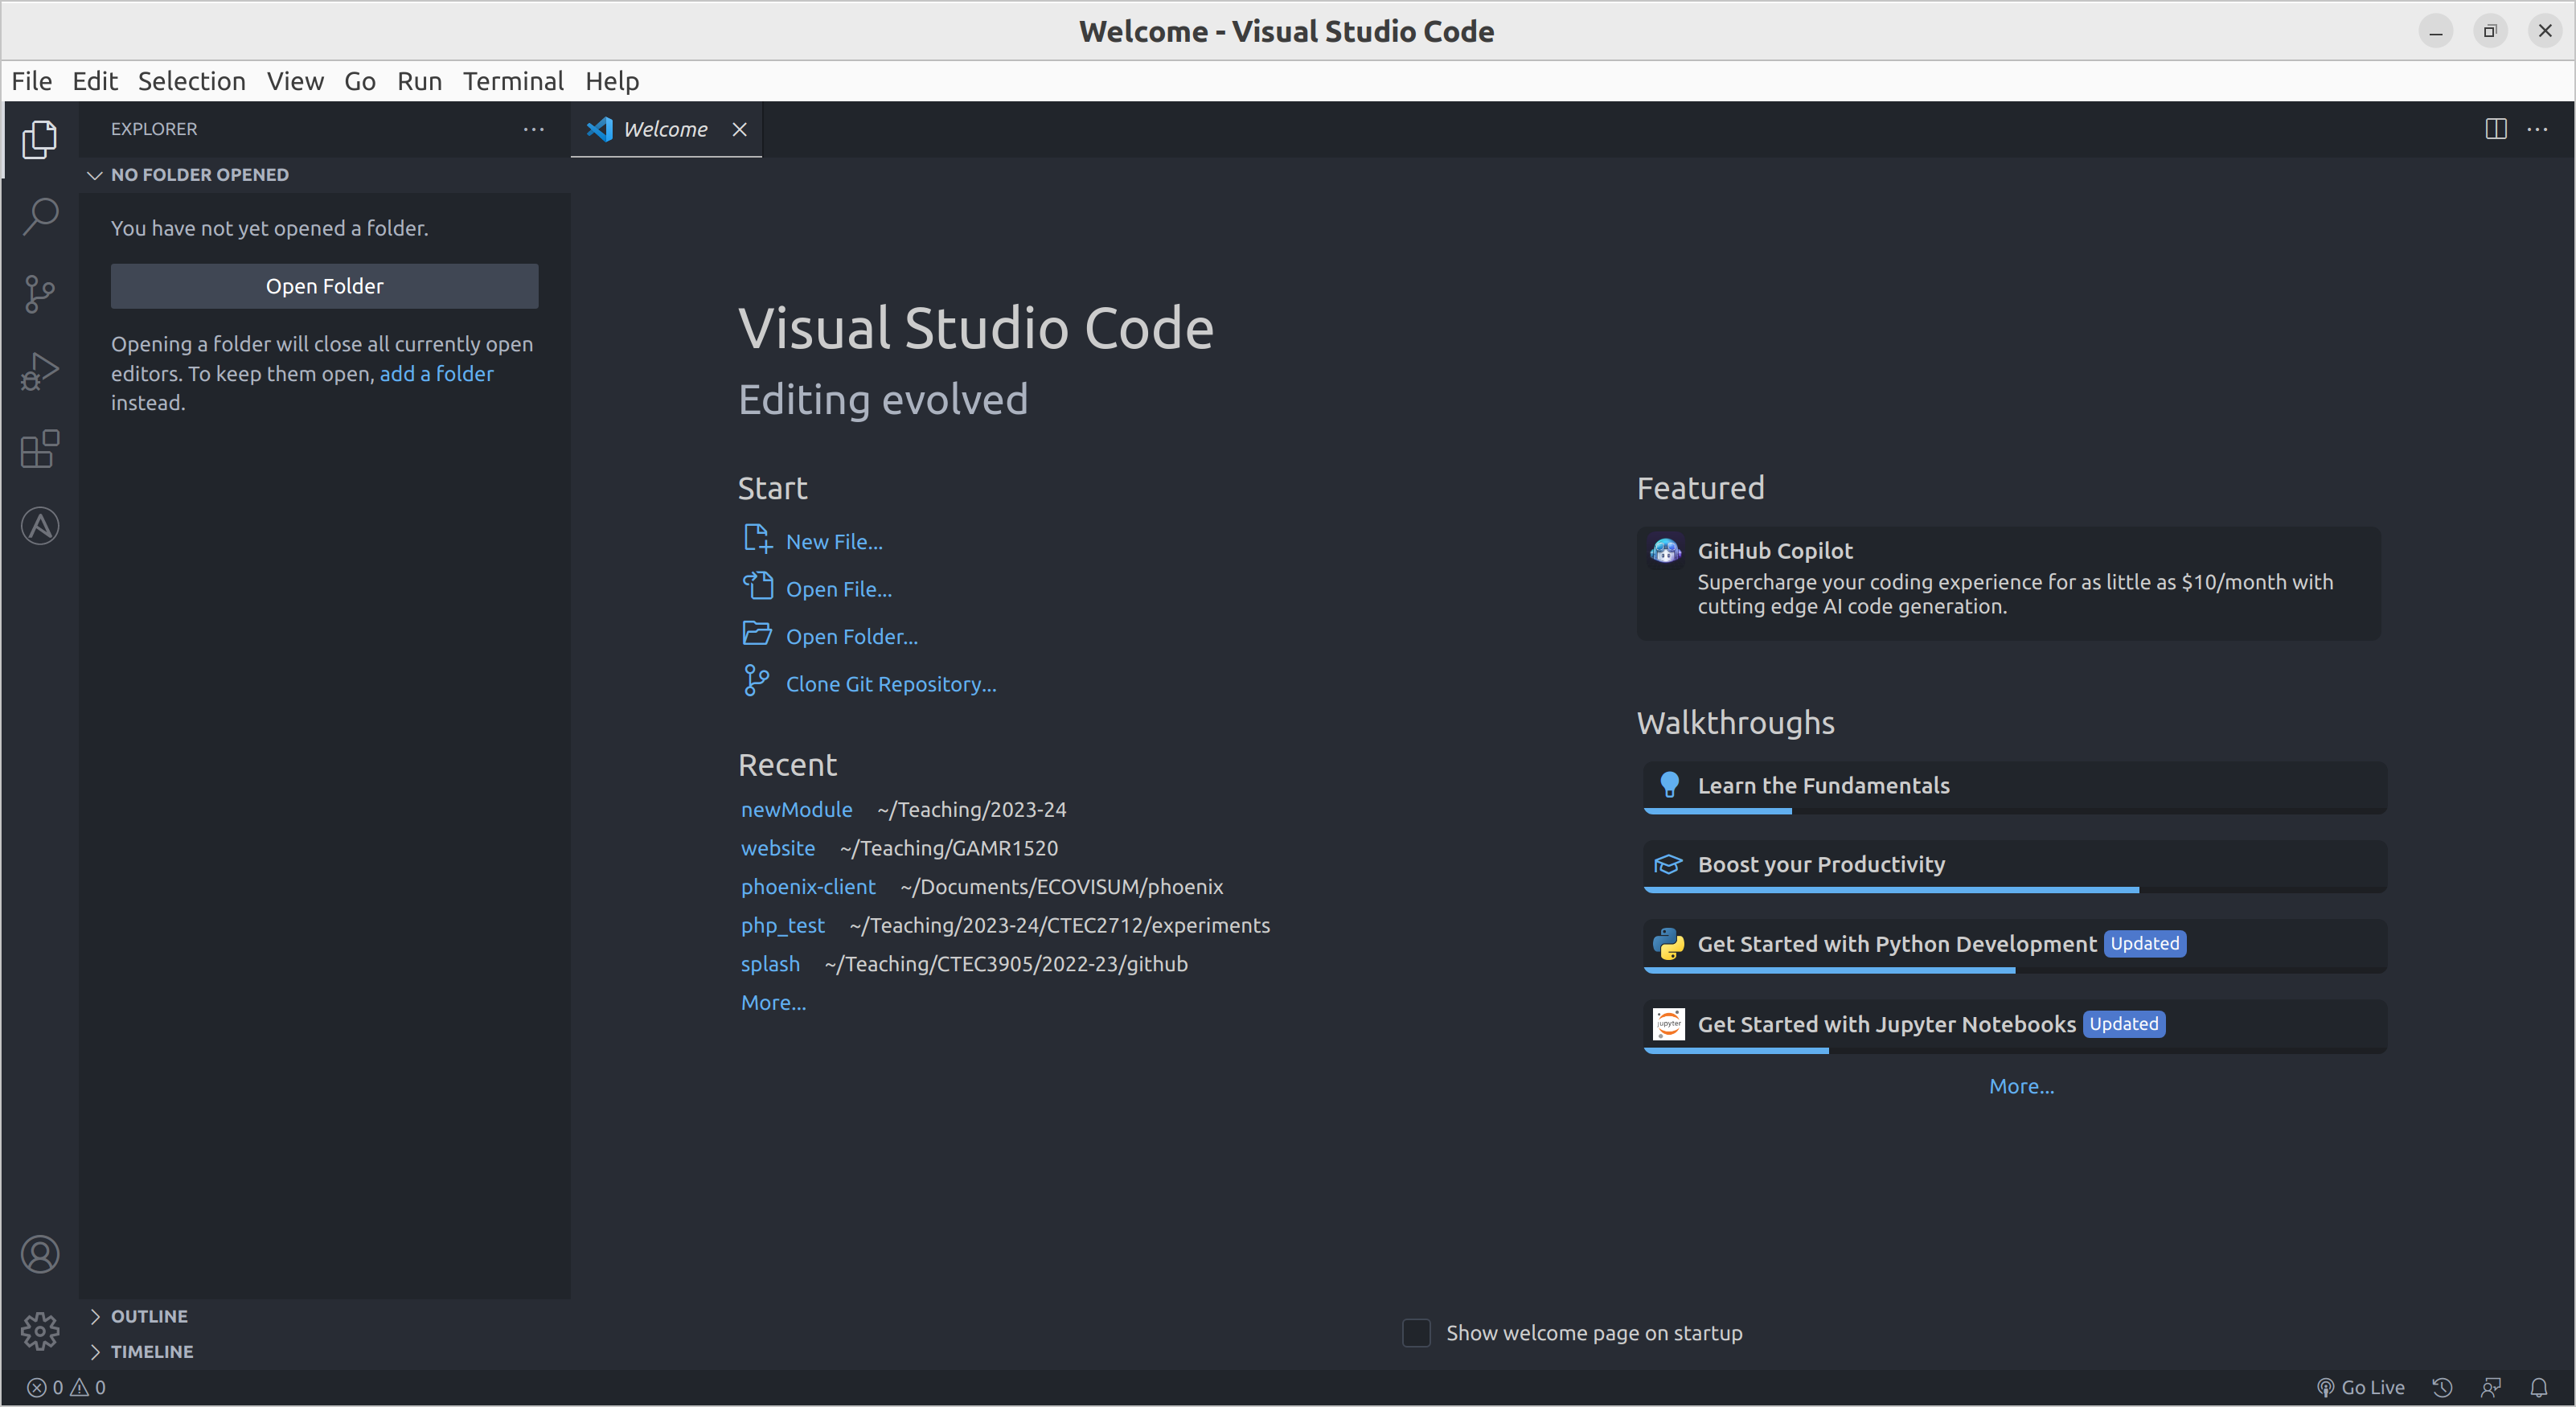
My VSCode, I have a few extensions installed
Other code editors are available, but according to the 2023 stackoverflow developer survey, VSCode is the most popular text editor with developers by a huge margin.
Installation
Download VSCode for your platform and do the normal things. Installation should be fairly painless.
Once installed, the system should already be set up for basic web development. So let’s do something very simple.
Creating our first HTML document
Hypertext Markup Language (HTML) is the backbone of the web. HTML is an open standard and was one of the core technologies originally developed by Tim Berners-Lee. When we browse to a website, the browser requests an HTML document from the server. HTML documents are the starting point for defining the core content of a website.
HTML documents are simple text files. We wrap content with HTML tags to indicate the meaning of the content. In this exercise we will create a very basic HTML template using VSCode. We will cover the basics, assuming you know nothing about HTML.
We will see that even a blank document requires a number of core elements and meta data to be valid. The blank template provided in this exercise will serve as a solid beginning to every document we create in this module.
Open a folder
When you open VSCode, you should see a series of icons on the left-hand side. Click the top one to open the file explorer. You should see something like this.
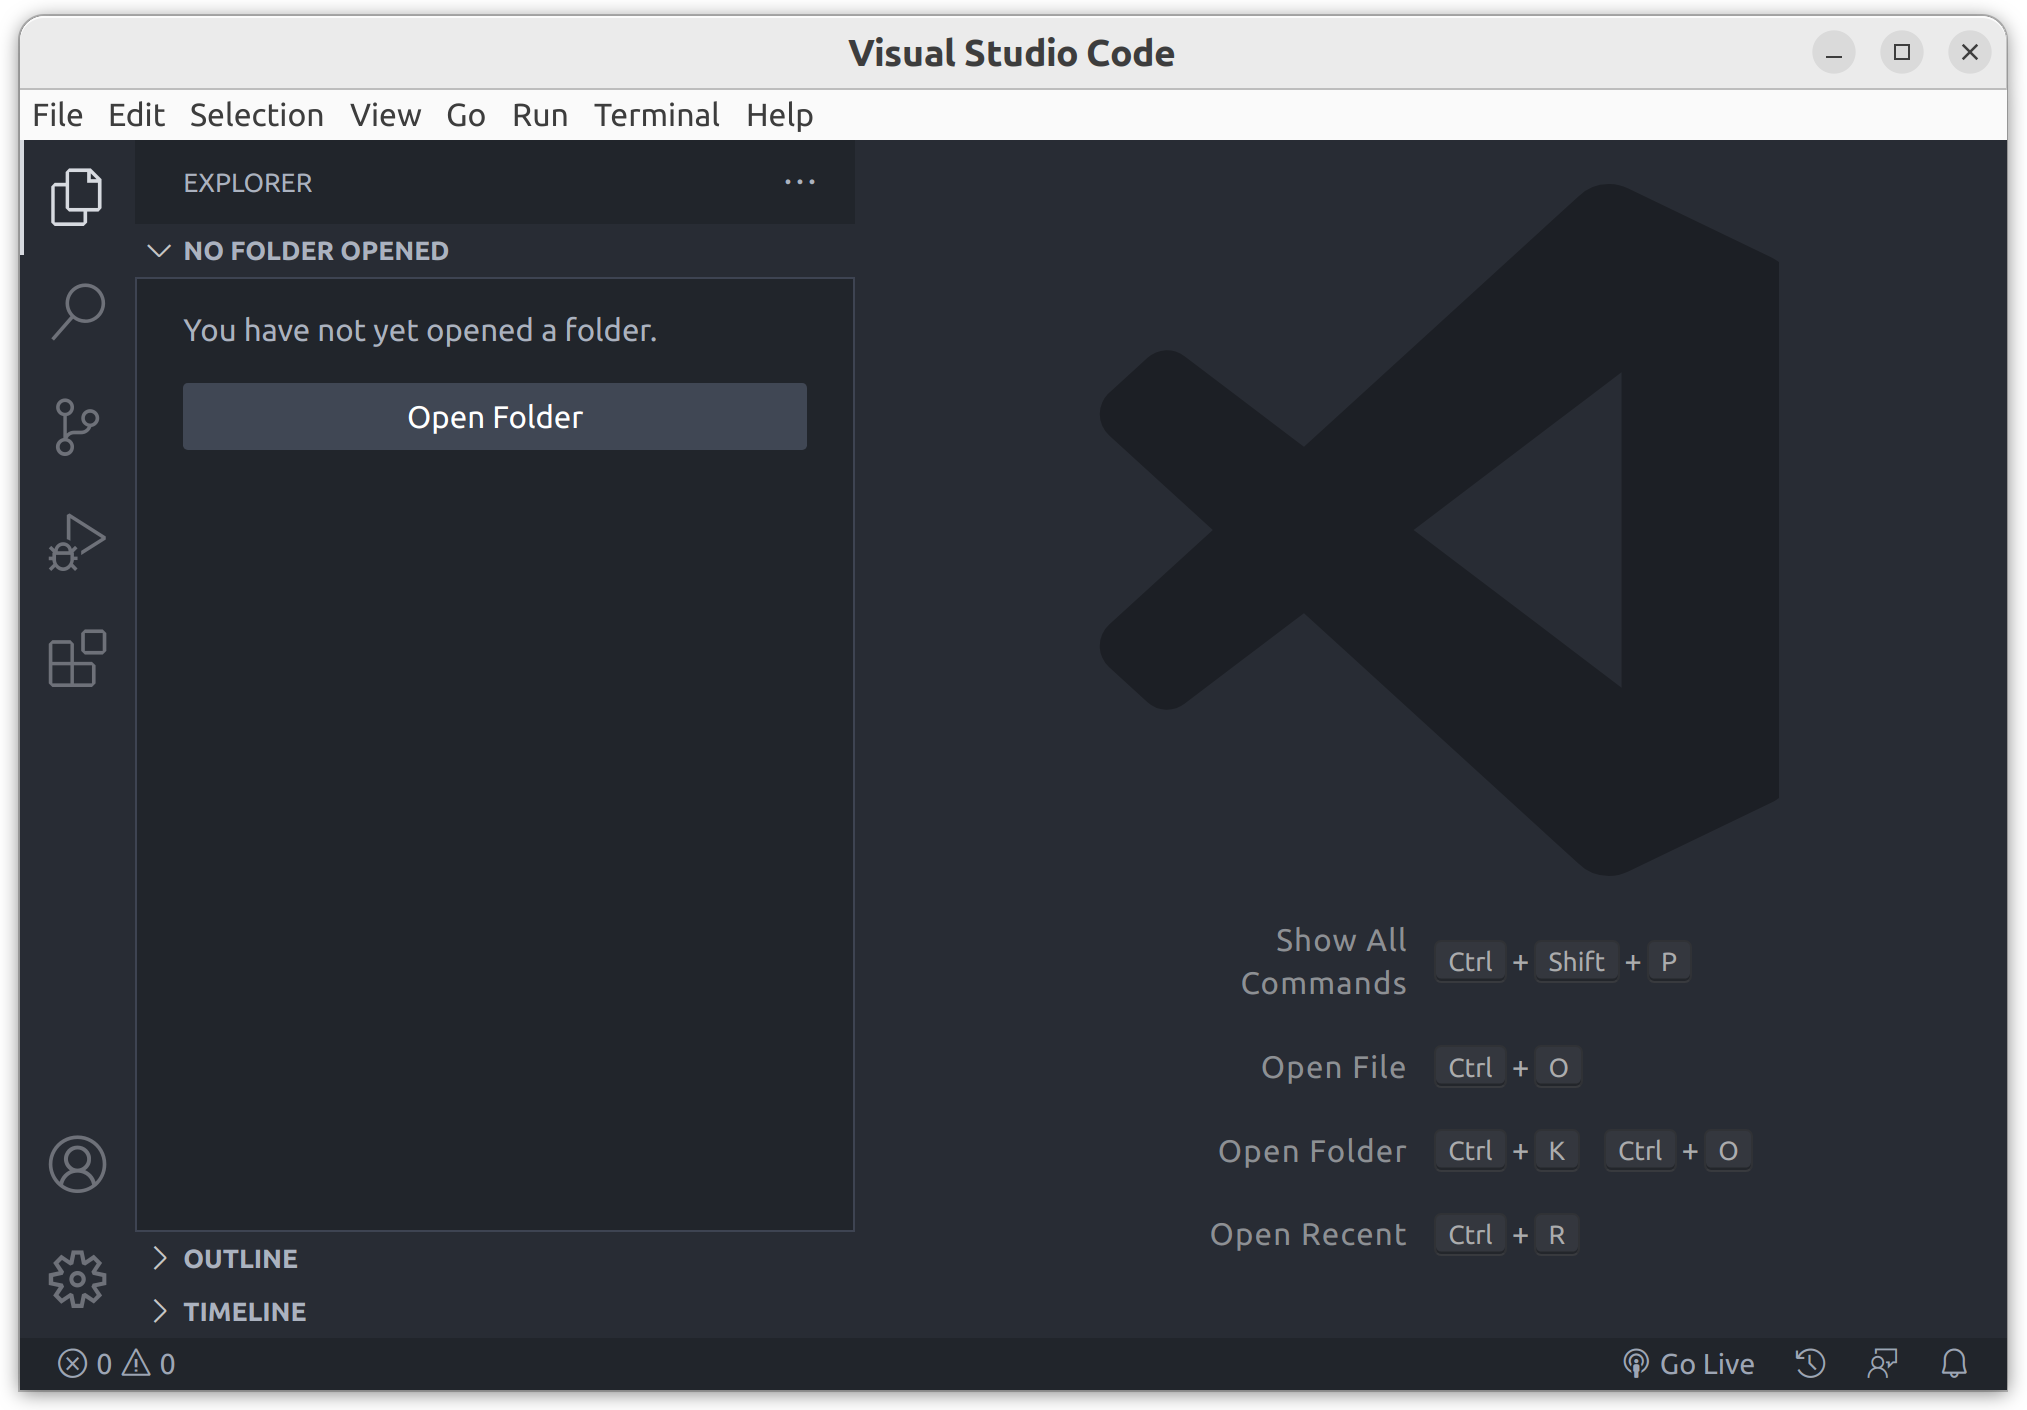
open folder
Open a new folder in VSCode. When you have opened a folder, you should see the file explorer panel that you can use to manage your project. It can be toggled on and off using the top-left icon or Ctrl + B.
It’s always preferable to open a folder rather than a file since most projects are managed as a set of multiple files within a folder.
Create a new file
There are many ways to create a new file including pressing Ctrl + N, right-clicking in the file explorer panel or clicking the new file icon at the top of the file explorer panel.
Create a new file named index.html.
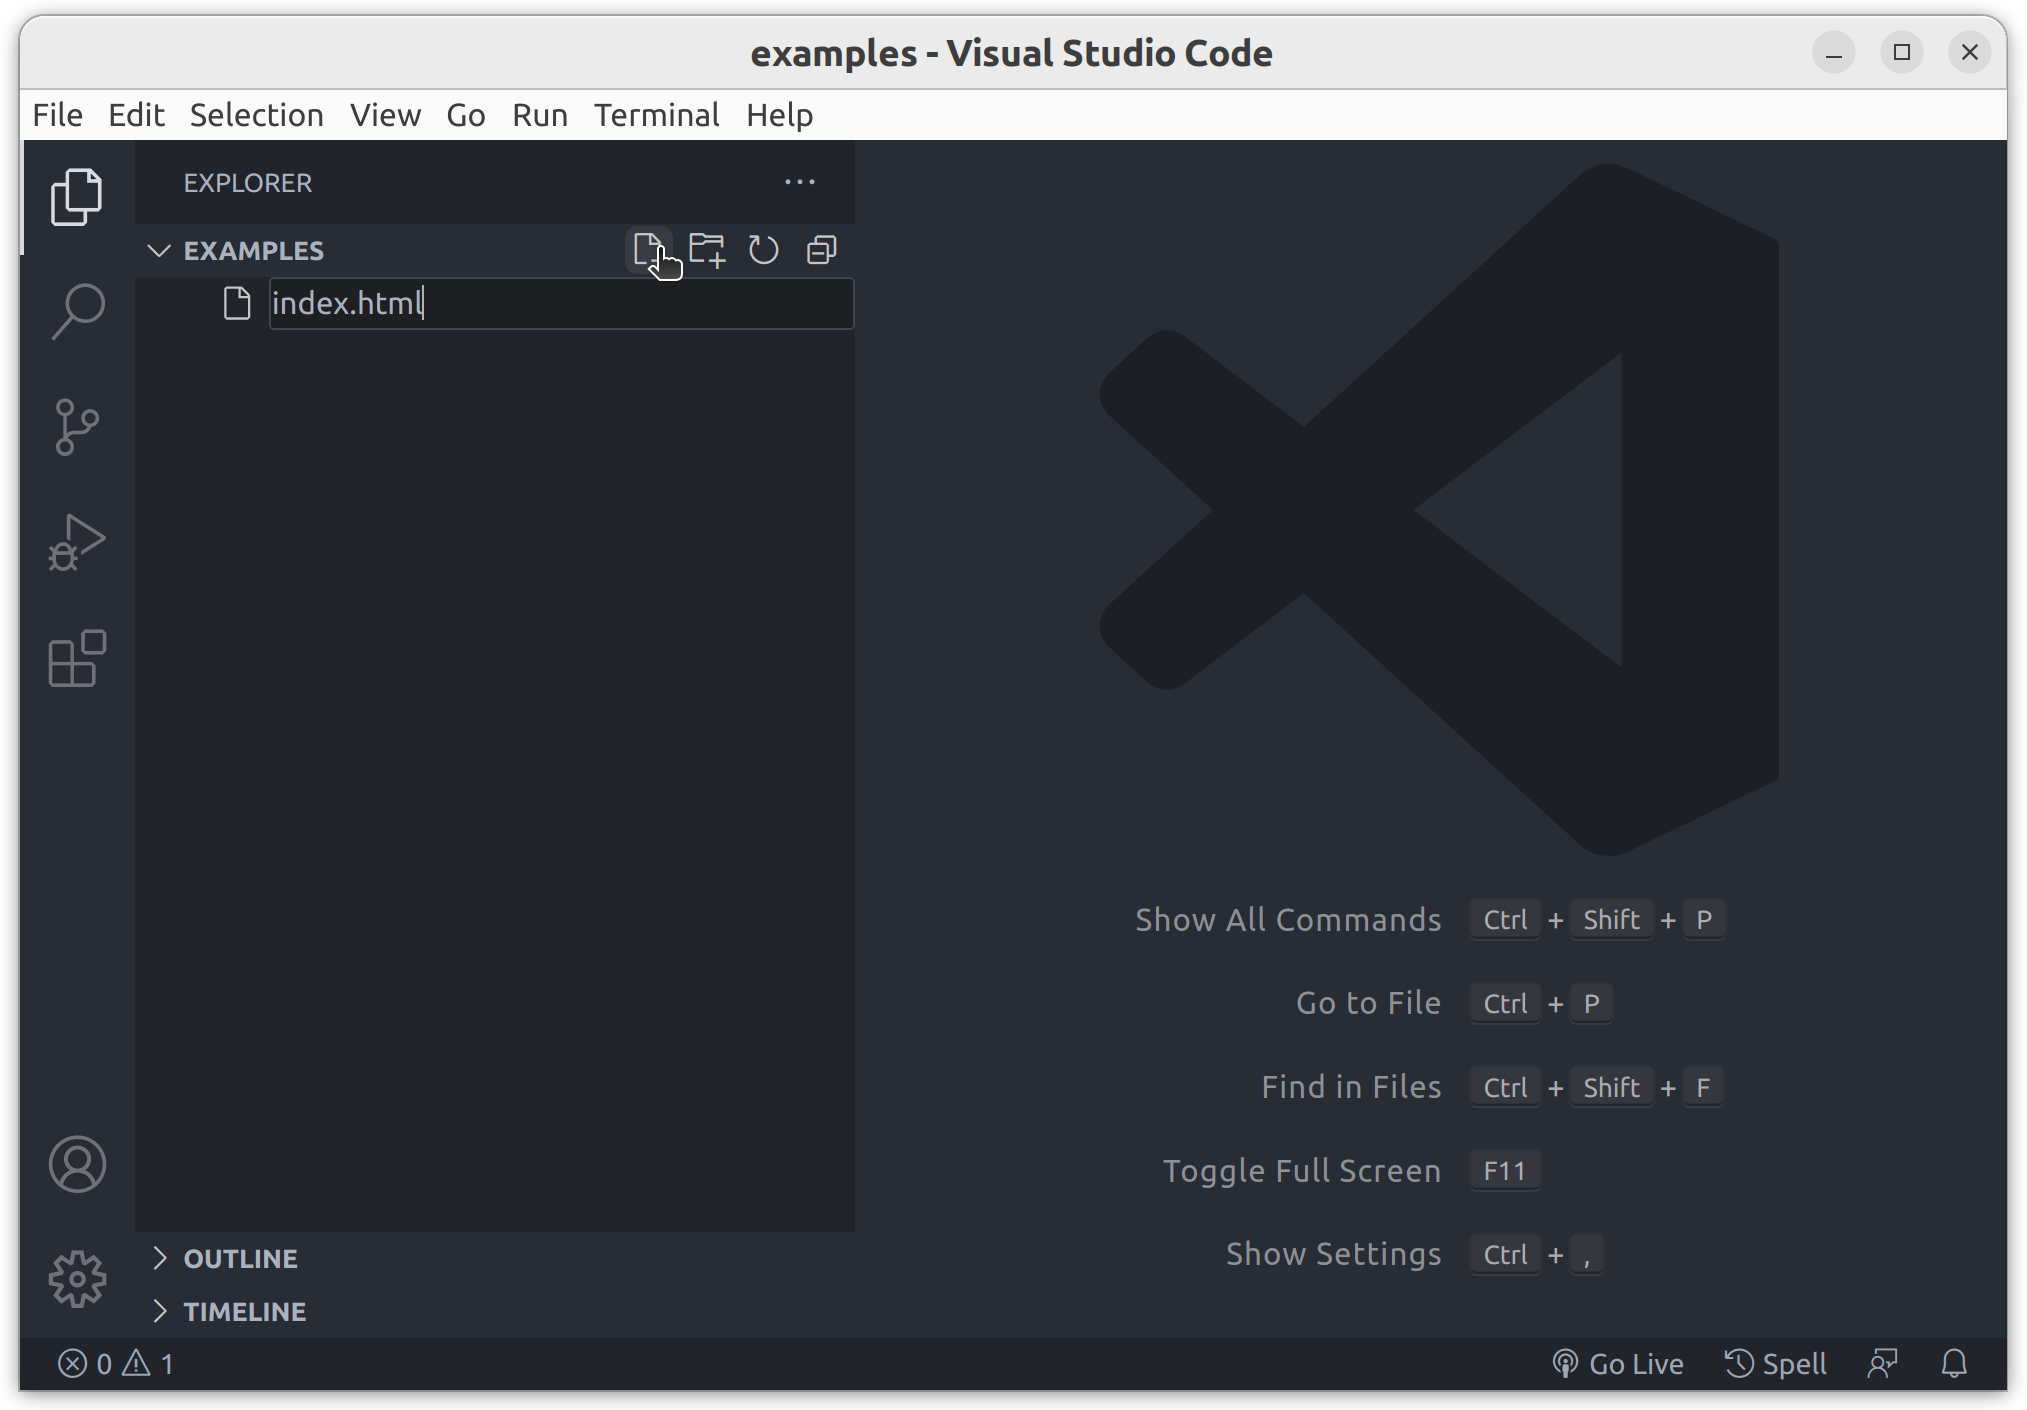
create file
index.html is the default filename for an HTML file.
In standard server configurations, when a web server receives a request for a folder, if there is an index.html file in the folder then this will be served by default.
A minimum HTML template
The absolute minimum HTML template looks something like this.
| |
Add the above code into your new file.
These nine lines of code are essential in any HTML document. We will look at each component individually.
The <!DOCTYPE>
At the top of every HTML file, we need to provide something called a doctype. This is a declaration that software can read to understand that the file should be interpreted as HTML (and crucially, which version of the HTML standard to use).
| |
Our template contains a simple, modern doctype (<!DOCTYPE html>) which indicates the browser should use the current, most modern HTML standards.
The doctype is only really needed for legacy purposes. Note that an HTML document written in 1992 would look quite different from a modern document, but it will still be rendered correctly by modern browsers if the older doctype is set correctly.
These are some older doctypes you may encounter on the web:
1
2
3
4
5
6
7
8
<!DOCTYPE HTML PUBLIC "-//W3C//DTD HTML 4.01//EN" "http://www.w3.org/TR/html4/strict.dtd"> <!DOCTYPE HTML PUBLIC "-//W3C//DTD HTML 4.01 Transitional//EN" "http://www.w3.org/TR/html4/loose.dtd"> <!DOCTYPE html PUBLIC "-//W3C//DTD XHTML 1.0 Strict//EN" "http://www.w3.org/TR/xhtml1/DTD/xhtml1-strict.dtd">If your code was written for older browsers, you may need one of these. Luckily, these days we can always use the standard HTML5 doctype as specified above.
the <html> element
The doctype is followed by the <html> element.
This is where all the content for the page is stored.
A valid HTML document consists of a doctype and an <html> element only.
All your content should be inside the
<html>element.
| |
The <html> element contains a <head> element and a <body> element only.
No other content is allowed inside the <html> element.
The <head> element
The first element within the <html> element is the <head> element.
The <head> element is not visible on the page, it contains information about the document.
In this case, it contains only a <title> element.
The content of the <title> element is not visible on the page, but it will typically appear in the browser tab when viewing the document.
| |
The <head> element will typically contain many more elements such as links to stylesheets and scripts and explicit meta data providing information about the document.
The content of the
<head>element can be used by the browser but they are also accessible by systems such as google search when their web crawlers visit your page. They can be used to e.g. work out the text presented in the google search result.
The <body> element
The <body> element is where we will add all the visible parts of the document.
This is typically what we will refer to as the content of the document.
| |
So far, we have no content in our web page. Before we add some content, we should look more closely at the tools provided by VSCode.
Using emmet
You may have noticed when you type something into VSCode, the editor offers suggestions and options. Some of these are driven by a tool called emmet which is built into VSCode as well as other editors.
You may find this emmet cheatsheet useful to save as a reference.
For example, if you delete all the code in index.html and place your cursor in the file then you can type a single exclamation mark (!) to trigger the basic HTML5 template.
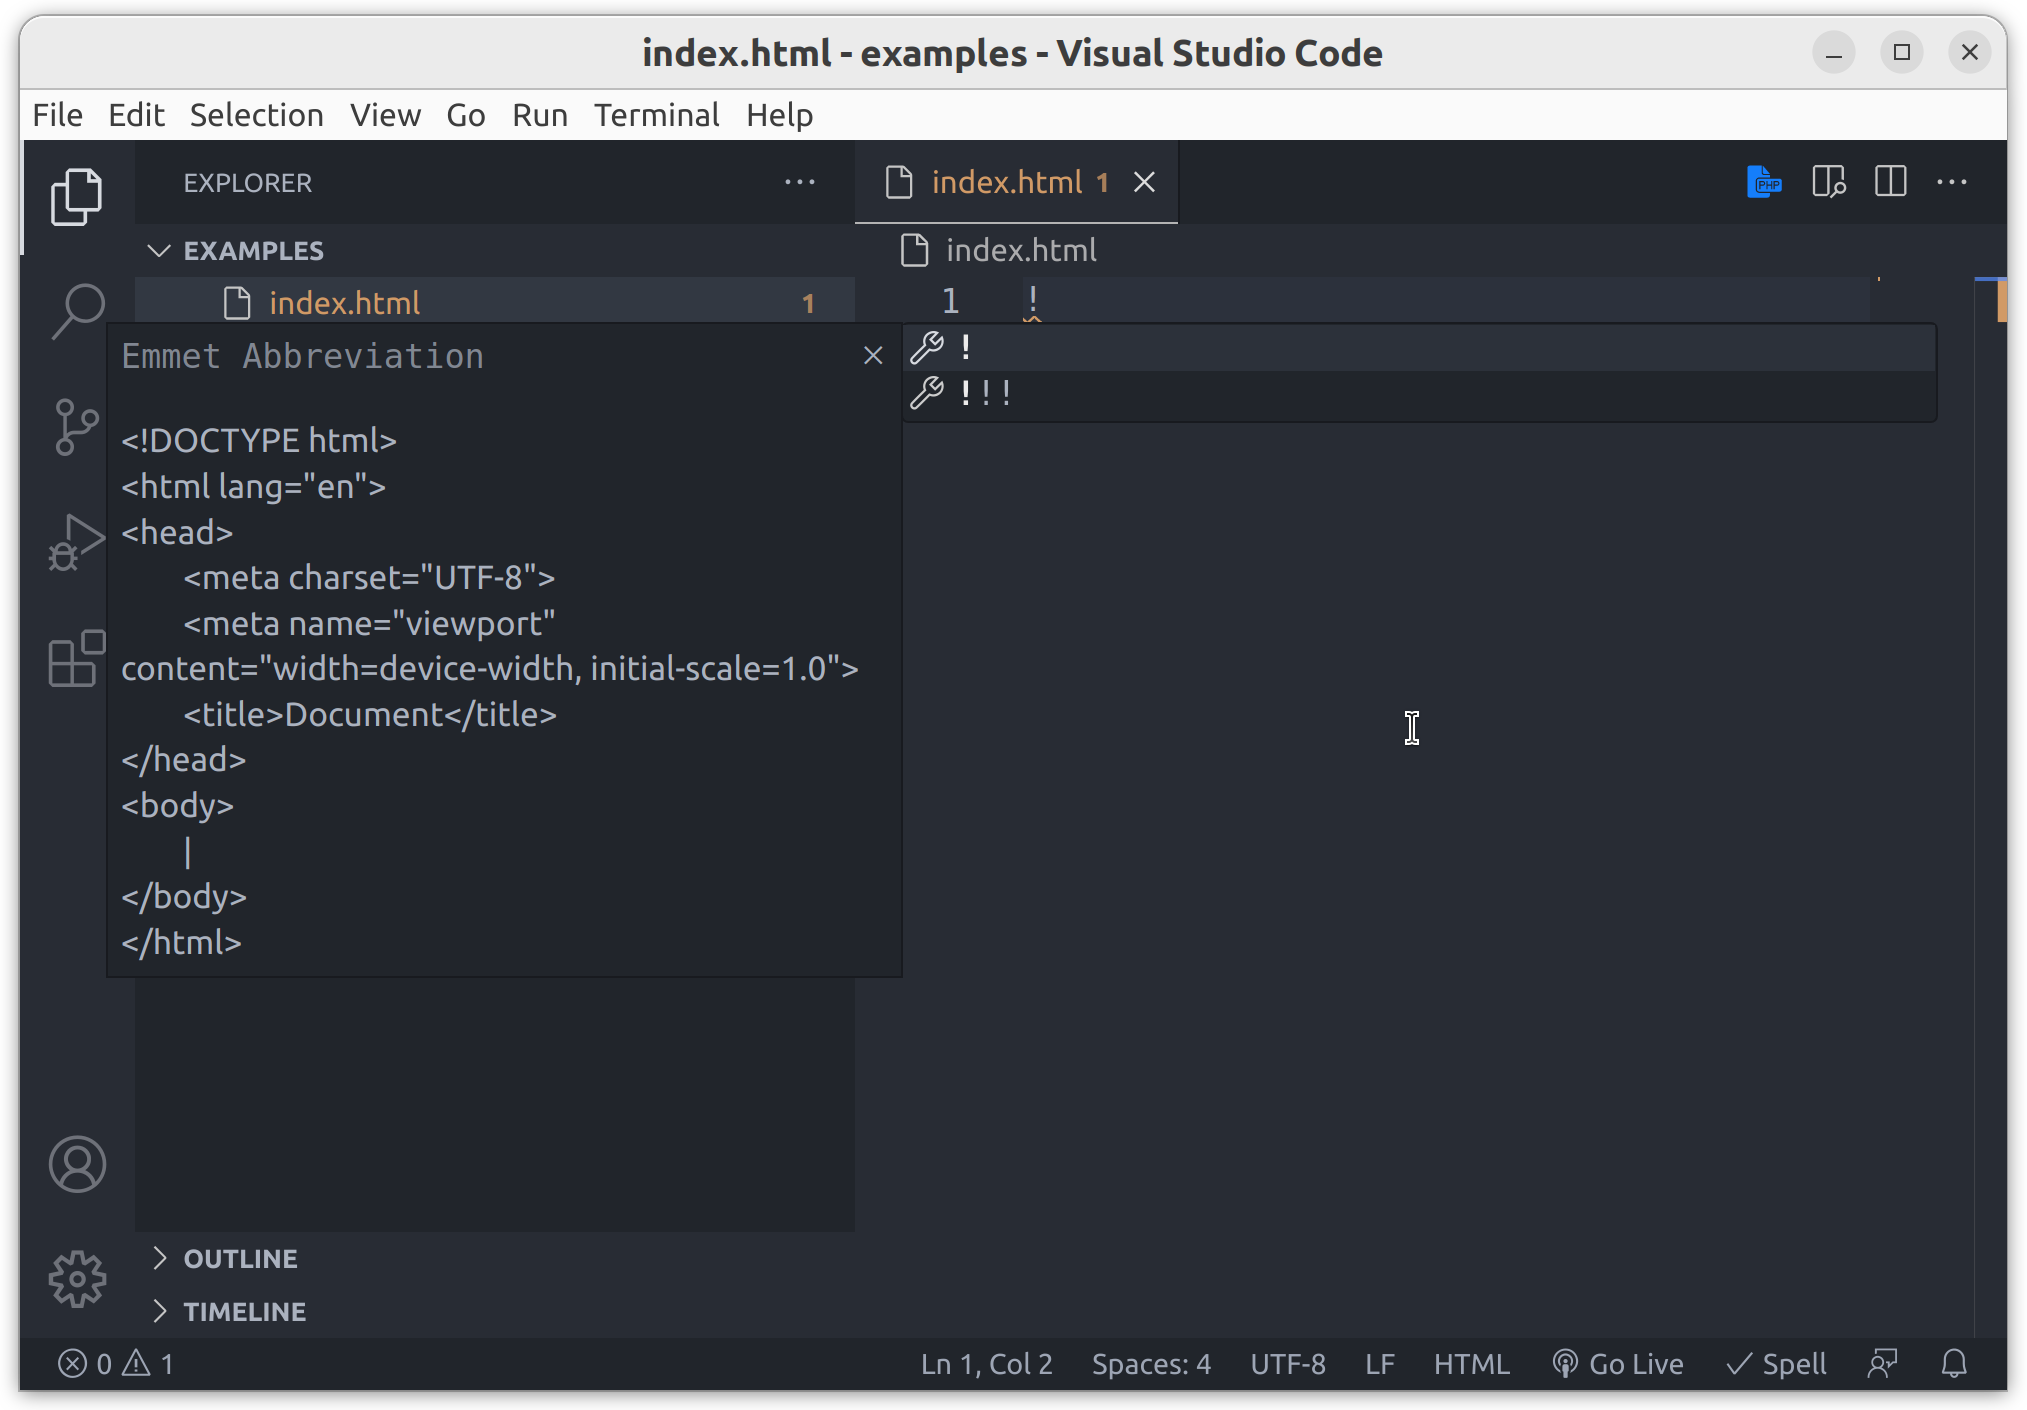
Emmet HTML5 template
Press enter or tab to add the template into the file. You should get something like this.
| |
This is how we recommend starting any new project.
Notice a few upgrades to our template above including a lang attribute and two <meta> elements.
The lang attribute
There’s a lang attribute on the <html> element.
| |
This allows browsers to know the primary language of the page and supports tools such as search engines and browser-based translation. If your content is not in English then you should choose the appropriate language code.
The language setting of any element is determined by looking up the chain of parent elements until a
langattribute is found. So including it on the<html>element sets the default language for the whole document.
The charset <meta> tag
Inside the <head> element we also have a <meta> tag (it has no closing tag because it is a void element) declaring the character set for the document.
| |
Typically declaring a UTF-8 character set is good for most documents.
If you did need to use a different character set, this is where you would declare it.
Basically don’t change this unless you know exactly what you are doing.
The viewport <meta> tag
There’s another <meta> tag.
This one is for the viewport.
| |
It essentially tells mobile browsers not to mess with the viewport.
In the early days of mobile browsers, most sites were (obviously) not designed to be viewed on tiny screens. The solution was to emulate a larger viewport, so mobile browsers will zoom out by default.
This additional tag is now necessary to tell the browser that the viewport should be the real device width and should not be zoomed out.
Validation
We can validate our code using the W3C markup validator. Simply paste your document into the page and click the check button.
This should provide a report with no errors or warnings.
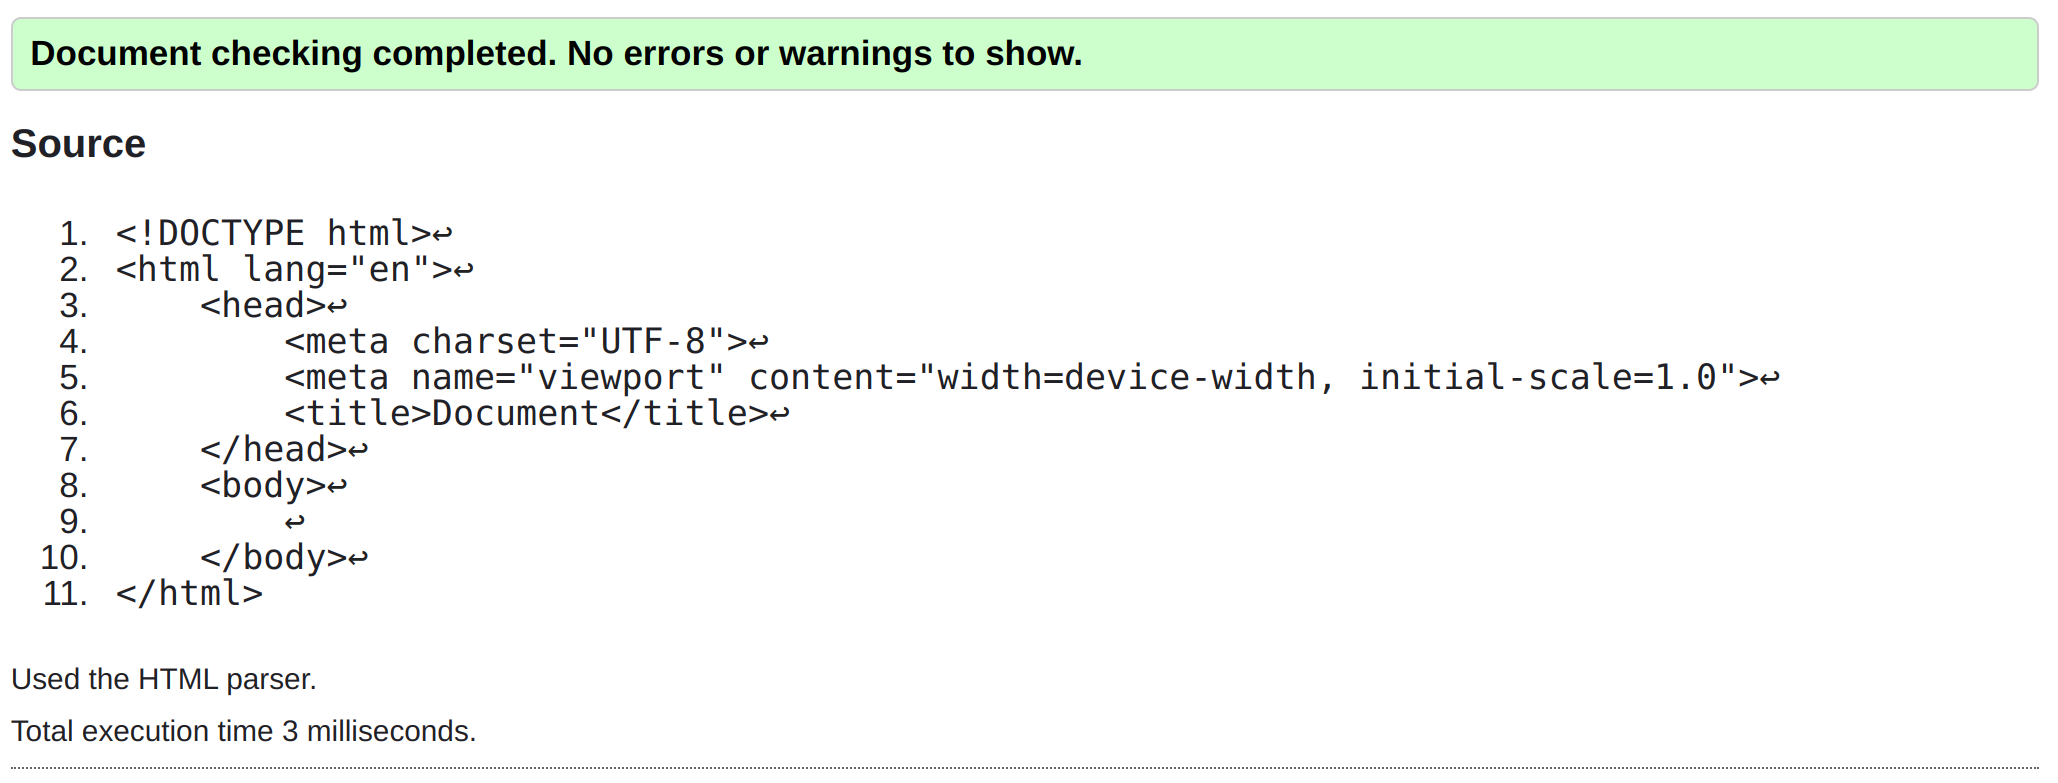
Our empty template validates perfectly
Try validating our original minimal document, it should issue a warning about the missing lang attribute.
We should always strive to give the browser a valid document. It’s easy to make mistakes when writing code that lead to an invalid document. Often the browser will correct your mistakes automatically. However, some mistakes (and collections of mistakes) can cause the browser to misunderstand your document.
Using the validation errors as guidance is a great way to improve our documents and ensure the browser sees what we were intending. Whilst you are getting used to creating HTML documents, its a good idea to use the validator regularly to check you haven’t missed something simple. As you gain experience you will find your documents pass validation more and more often.
Using the ’live server’ extension
We will install the live server extension to run a simple HTTP server from within VSCode.
On the left side of your VSCode window, select the extensions icon (usually the bottom icon) or use Ctrl + Shift + X to open the extensions panel and search for “live server” using the search bar at the top of the panel.
Find the live server extension, click the “install” button and wait a few moments.
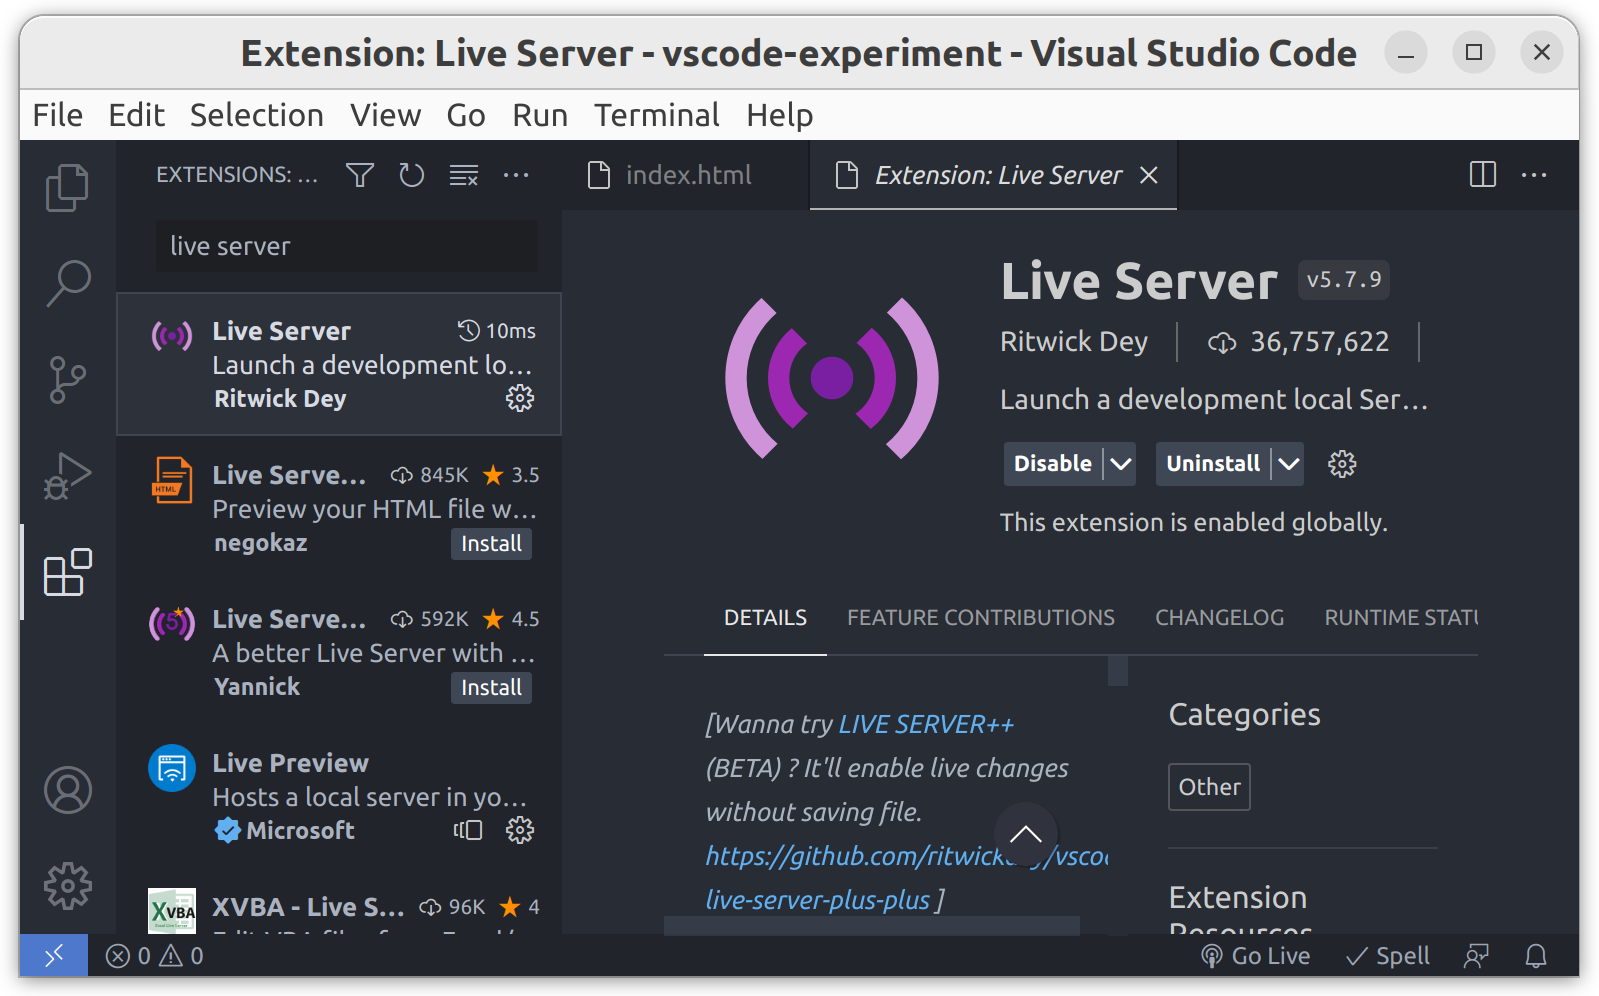
the live server extension is already installed on my VSCode
Once installed you should see a small “Go Live” button has appeared at the bottom of your VSCode window.

the ‘Go Live’ button
Clicking this will start up a web server and open a browser tab to serve your project. The server will be serving the top level folder you have open in VSCode.
If you don’t have a folder open in VSCode, then it will prompt you to open a folder.
Now finally we can see our document rendered in the browser. However, since it has no content, there is not much to see.
It should look something like this…
The next exercise will guide you through adding some simple content to your page.
Challenges
Before moving on, try adding some HTML content and see how it is rendered in the browser. Check the online validator to make sure your code is valid.
Recreate something simple
See if you can create something like this.
Use this basic tutorial as a reference.
Play with validation
Remember to validate your code.
Mess about with the code and try to trigger some validation errors. You may be surprised about what you can get away with.
A classic error would be to close an element which has not been opened.
Conclusion
VSCode is a powerful editor and will allow you to write code in HTML, CSS, JavaScript, PHP and SQL (as well as many more languages) with full syntax highlighting and “intellisense” auto-completion. Using extensions (such as a web server), we can extend the functionality to make VSCode a powerful customised tool, specifically for web development.
This exercise has hopefully been pretty straight forward. We have learned a simple way to create a template for a new HTML document using the default emmet template in VSCode.
It’s important to be aware of the details of the provided template, but you don’t need to worry too much about them when coding. Just be aware that each piece of the default template has a purpose, and that you should think twice before messing with it.
VSCode tutorials
We have only scratched the surface of VSCode in this exercise. Check out the official VSCode videos. In particular, this video will give you a good start.
For obvious reasons, we would prefer it if you watched video content outside of timetabled lab sessions. You should use the sessions to work through exercises, experiment and to ask questions.